Switch for steam bad have removed 14 screw so far but plastic body still tight around motor .i need some help
Shark is notorious for placing screws in odd places. look at the mini roller glides on each end at front ( one on each side of the front ) usually one under each of those, usually on the sharks is an item looks like it can be popped off or removed, then there most likely is a screw there.
Testimonial: "I now have the body off. I missed a screw by the motor.However shark will not allow me to buy the off on switch for the steam part of the machine,they want me to send entire machine to them.Cost for them to fix is 29.95 but shipping entire machine both ways would be expensive"
check ebay for the model and the needed part, the parts are on there and cheaper.
×
 This should go without saying, but the first step is to unplug the machine. Next, open it up and remove the bag.
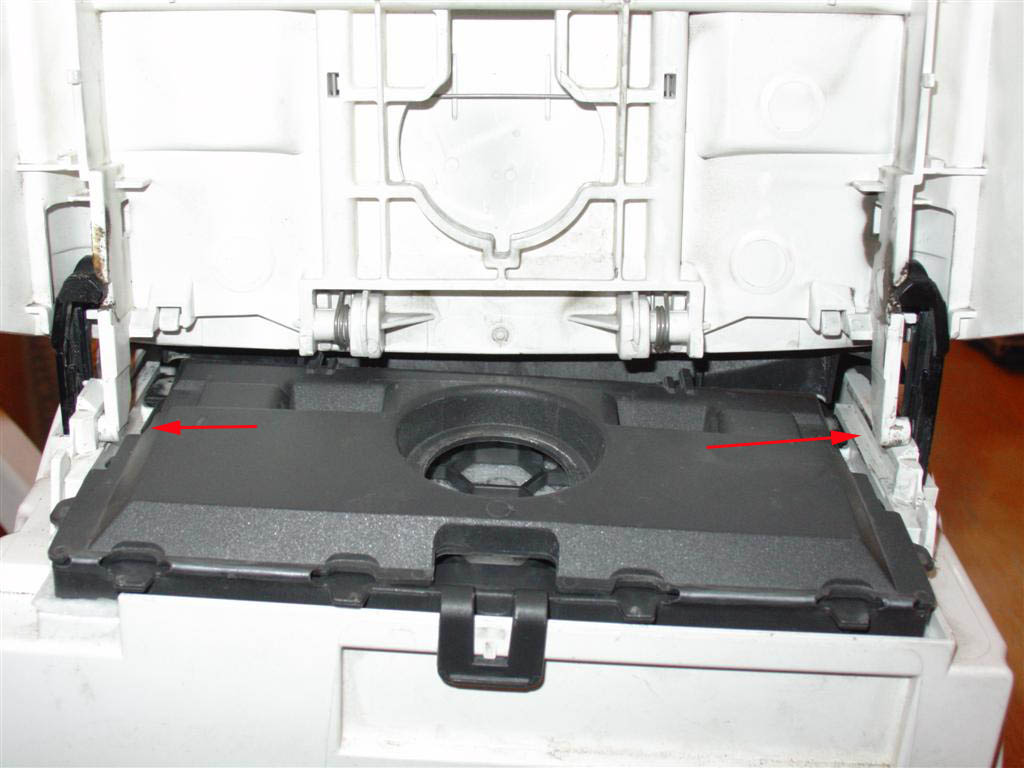
Now you will need to remove the lid. There are white plastic clips on either side that you must carefully disengage by pushing them towards the center of the machine. Click the picture above and you can see that the right side clip has been disengaged.
This should go without saying, but the first step is to unplug the machine. Next, open it up and remove the bag.
Now you will need to remove the lid. There are white plastic clips on either side that you must carefully disengage by pushing them towards the center of the machine. Click the picture above and you can see that the right side clip has been disengaged.
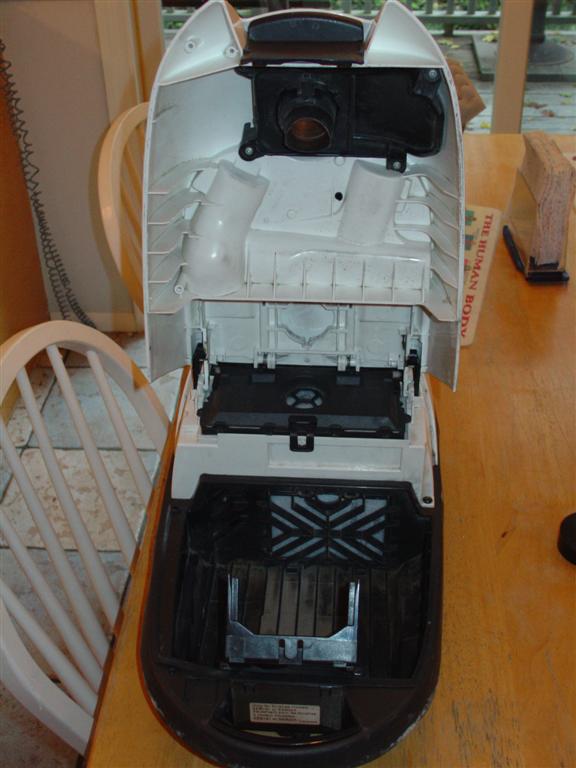
 Once the clips are disengaged, the lid can be lifted clear of the body. Note the thin black plastic tabs on the lid that insert into slots in the body. Set the lid aside someplace safe where nobody will step on it. As an aside, I have twice replaced the dust channel, the fragile black piece of plastic visible at the top of the lid. Fortunately it is not a terribly expensive part and it is very easy to replace because it is only secured by four screws.
Go back to the vacuum cleaner body. The next step is to remove the air filter. It is secured by two fairly obvious screws. These screws also hold down the switch assembly, which we will remove in the next step. But for now, go ahead and remove the screws and lift off the air filter. Put it aside where you won't lose it.
Once the clips are disengaged, the lid can be lifted clear of the body. Note the thin black plastic tabs on the lid that insert into slots in the body. Set the lid aside someplace safe where nobody will step on it. As an aside, I have twice replaced the dust channel, the fragile black piece of plastic visible at the top of the lid. Fortunately it is not a terribly expensive part and it is very easy to replace because it is only secured by four screws.
Go back to the vacuum cleaner body. The next step is to remove the air filter. It is secured by two fairly obvious screws. These screws also hold down the switch assembly, which we will remove in the next step. But for now, go ahead and remove the screws and lift off the air filter. Put it aside where you won't lose it.

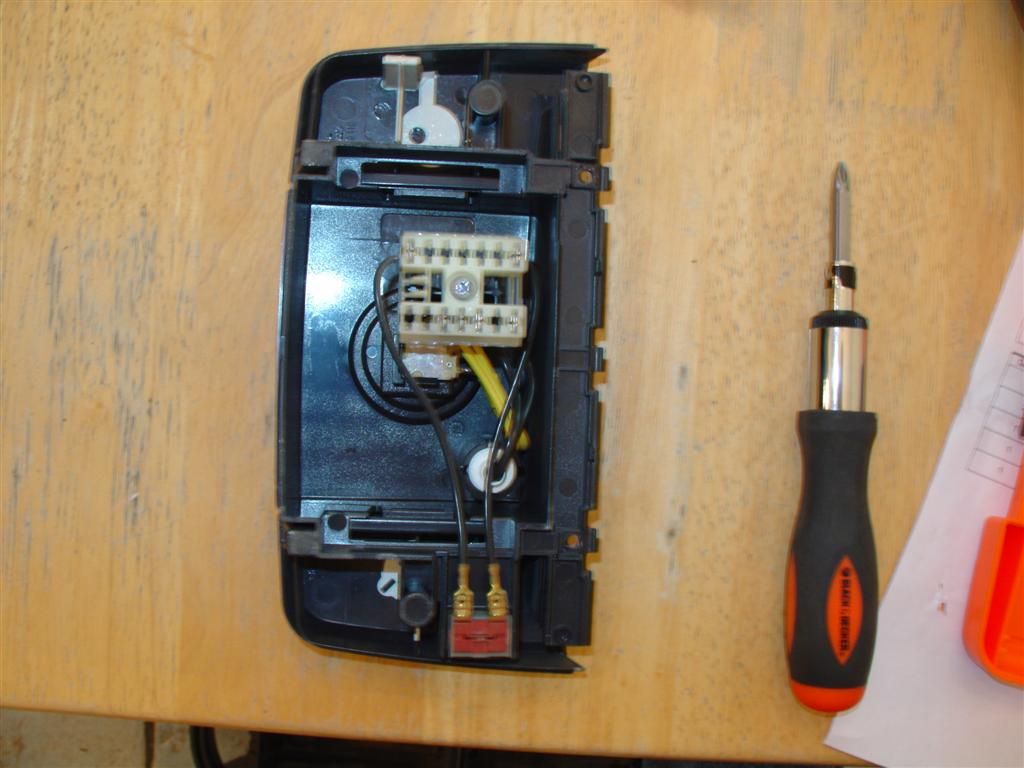 Here you can see that the air filter has been removed and we are ready to remove the switch assembly. At this point the only thing holding the switch assembly to the body is the electrical connector underneath, and a plastic pin or two. Get a good grip on the switch assembly and lift it straight up with a firm but gentle tug.
This is the underside of the switch assembly after it has been removed from the body. The white rectangular electrical connector in the center mates to the black rectangular electrical connector in the body, seen on the next picture. Put the switch assembly in a safe place until we reassemble the vacuum cleaner.
Here you can see that the air filter has been removed and we are ready to remove the switch assembly. At this point the only thing holding the switch assembly to the body is the electrical connector underneath, and a plastic pin or two. Get a good grip on the switch assembly and lift it straight up with a firm but gentle tug.
This is the underside of the switch assembly after it has been removed from the body. The white rectangular electrical connector in the center mates to the black rectangular electrical connector in the body, seen on the next picture. Put the switch assembly in a safe place until we reassemble the vacuum cleaner.
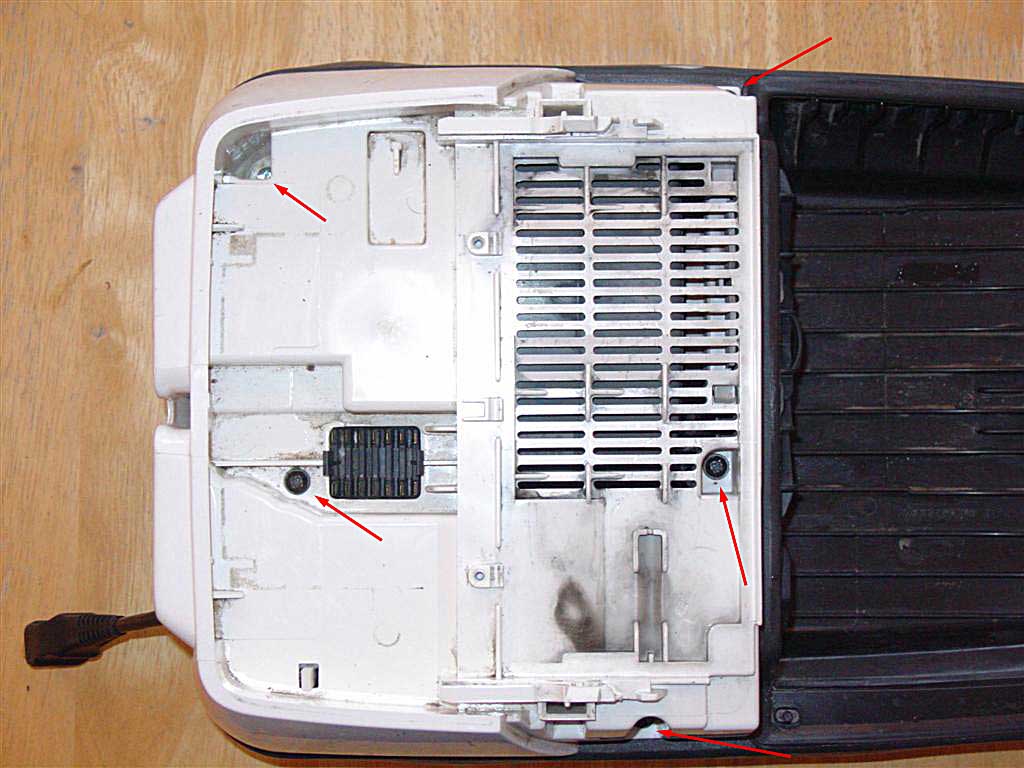
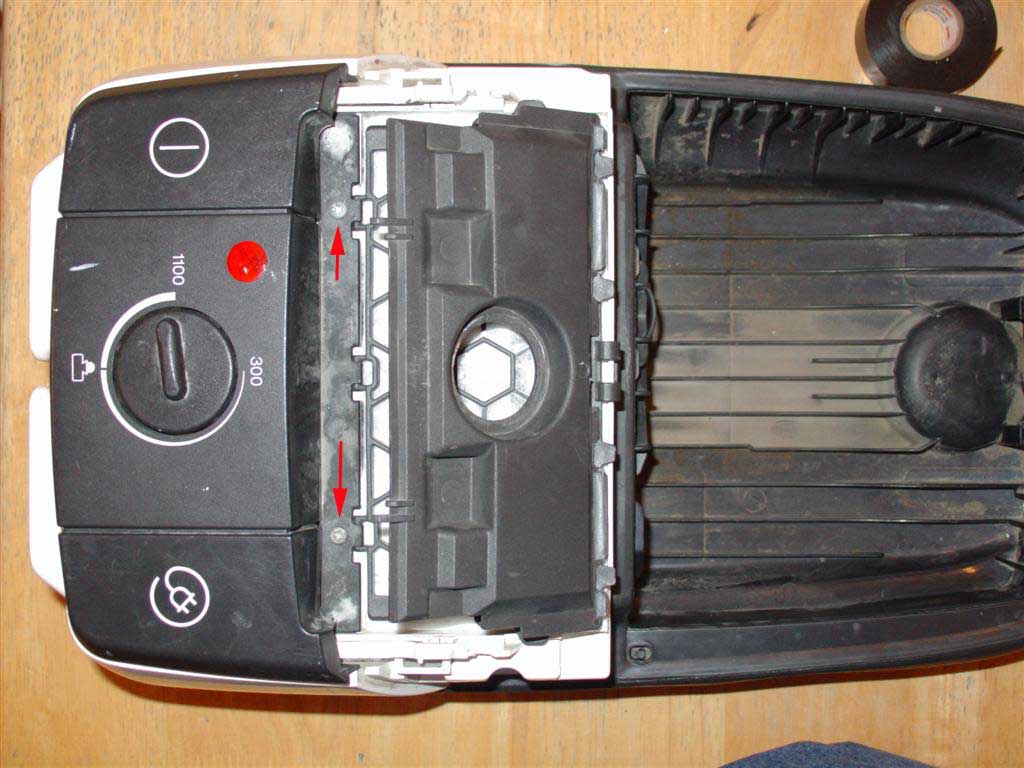
 Here we see the body with the switch assembly removed. We're almost there. The next step is to remove five screws, one of which at upper left is hidden in a deep recess. Click the picture above to see the location of these screws.
The five screws have been removed. Carefully flip the vacuum cleaner over so that the black bottom and the wheels are pointing up.
Here we see the body with the switch assembly removed. We're almost there. The next step is to remove five screws, one of which at upper left is hidden in a deep recess. Click the picture above to see the location of these screws.
The five screws have been removed. Carefully flip the vacuum cleaner over so that the black bottom and the wheels are pointing up.
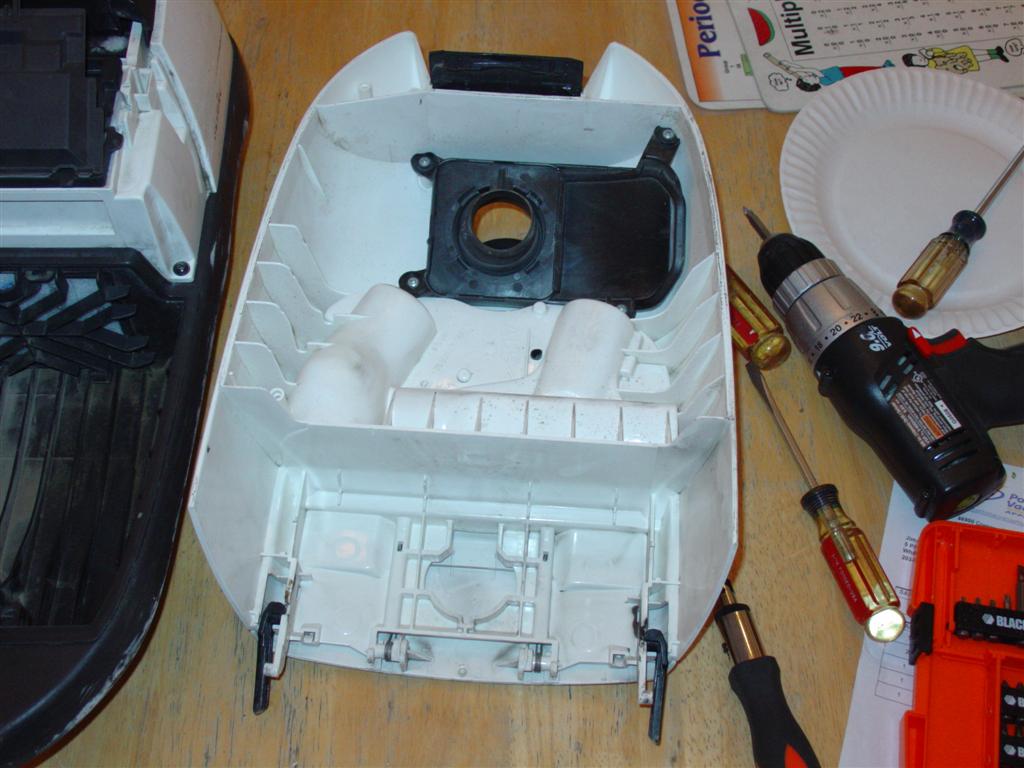
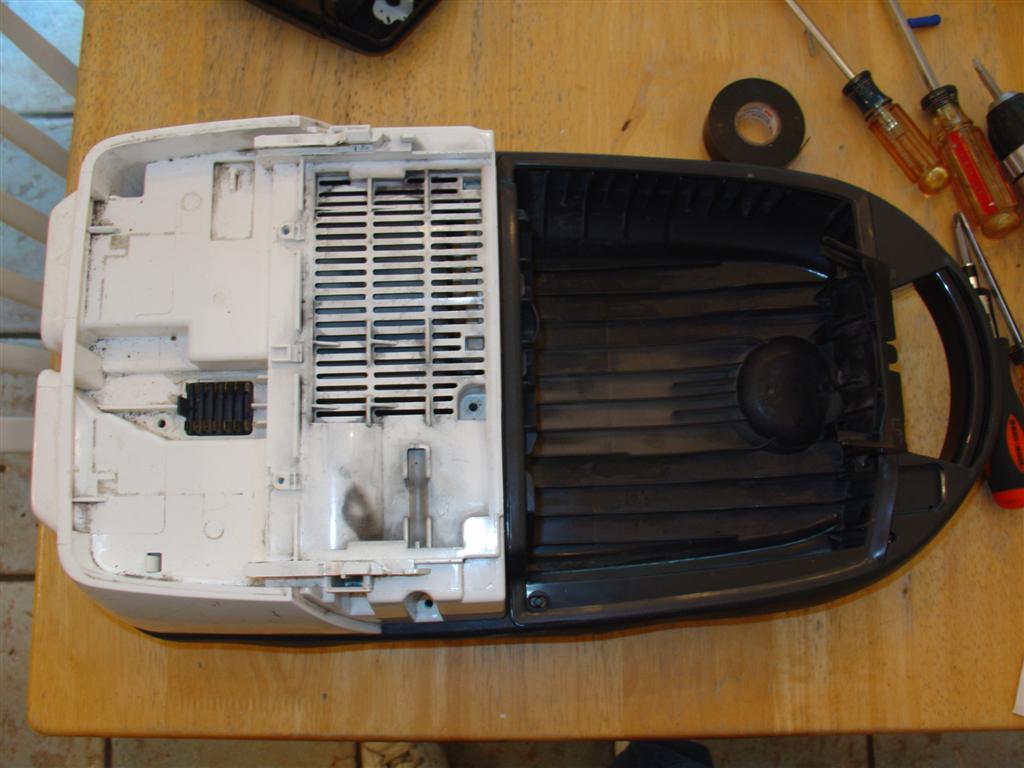
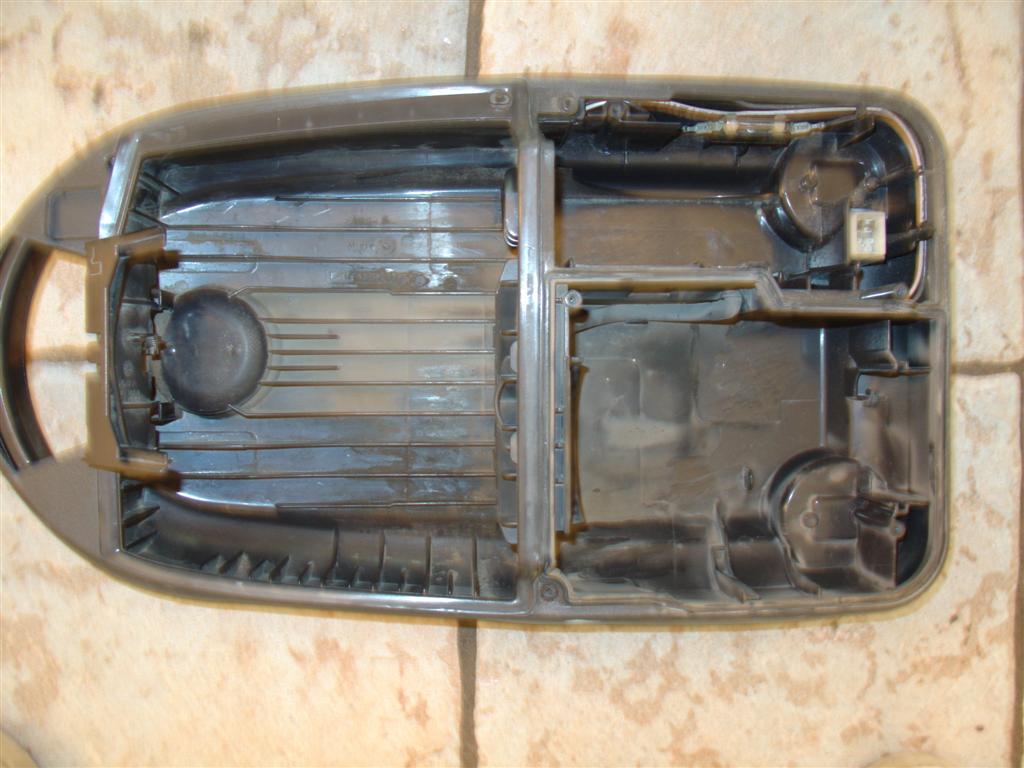 Here it is, belly up. Nothing is holding it together at this point, so just lift the entire base (the big black part) off and set it aside. It is not necessary to remove the rubber bumper that goes all the way around the outside of the base. As I learned the hard way, It is difficult to reattach.
The inside of the base is likely to be pretty grungy. You could clean it up a bit with a damp cloth (I did), but there are wires in there so I wouldn't get it too wet.
Here it is, belly up. Nothing is holding it together at this point, so just lift the entire base (the big black part) off and set it aside. It is not necessary to remove the rubber bumper that goes all the way around the outside of the base. As I learned the hard way, It is difficult to reattach.
The inside of the base is likely to be pretty grungy. You could clean it up a bit with a damp cloth (I did), but there are wires in there so I wouldn't get it too wet.
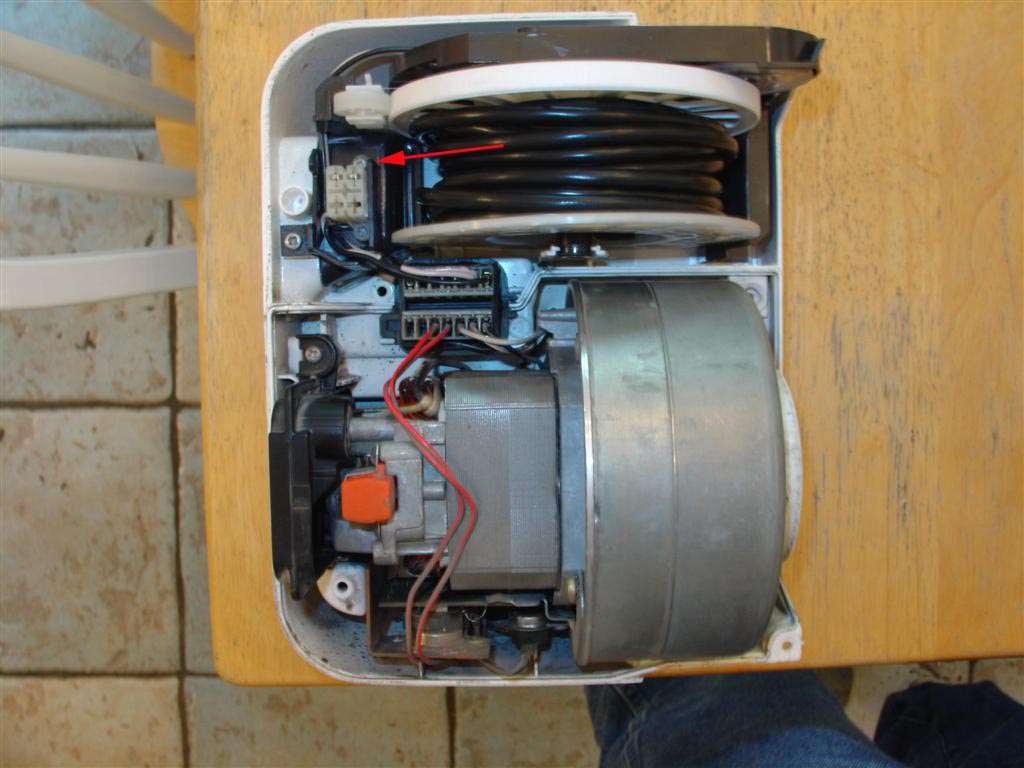
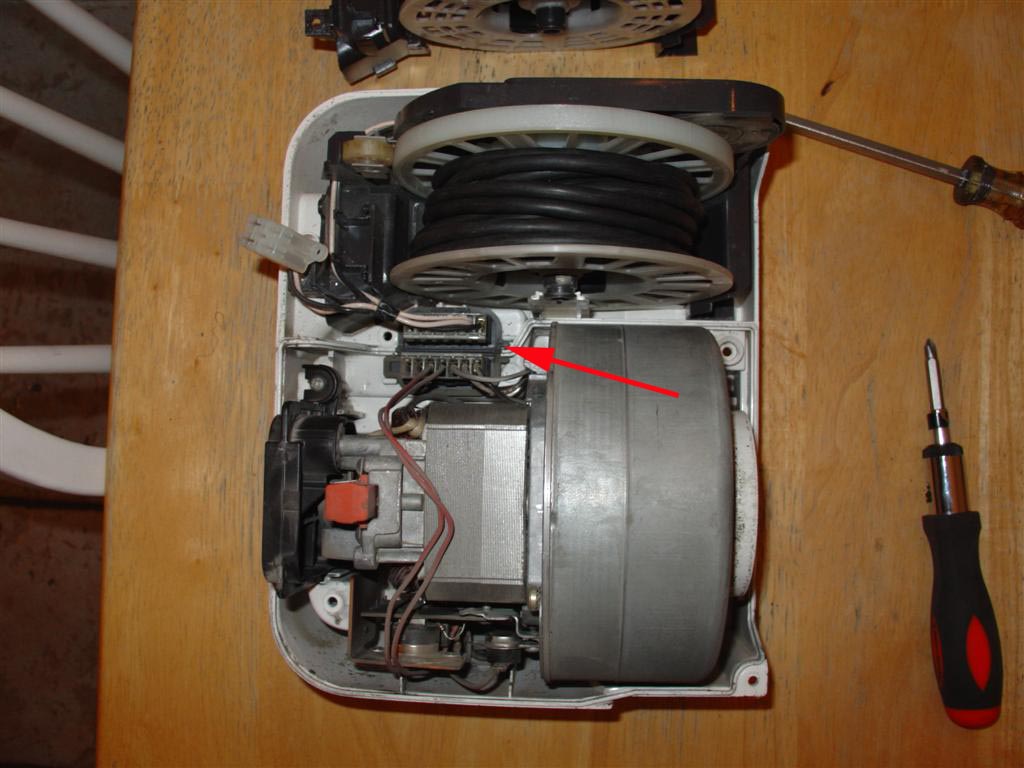 At last! The Miele's innards are exposed. The motor is at the bottom of the picture and the cord winder is at the top. Remove one screw securing the cord winder electrical connector and then disconnect the electrical connector. You may now lift out the cord winder and replace it.
I was also having an intermittent electrical connection problem which I thought was related to the problematic cord. It turned out to be an unrelated problem with one of the electrical connectors in the center of the machine, pictured above. Part of the plastic clip designed to hold the connectors together was cracked. Unfortunately I did not have a replacement part, so for now I wrapped some electrical tape around the connector to hold it securely together. This seems to have done the job. But the next time something else breaks on this Miele, I will order this part too and replace both at the same time.
Follow the instructions in reverse to put your vacuum cleaner back together.I hope you found my little tutorial useful.
At last! The Miele's innards are exposed. The motor is at the bottom of the picture and the cord winder is at the top. Remove one screw securing the cord winder electrical connector and then disconnect the electrical connector. You may now lift out the cord winder and replace it.
I was also having an intermittent electrical connection problem which I thought was related to the problematic cord. It turned out to be an unrelated problem with one of the electrical connectors in the center of the machine, pictured above. Part of the plastic clip designed to hold the connectors together was cracked. Unfortunately I did not have a replacement part, so for now I wrapped some electrical tape around the connector to hold it securely together. This seems to have done the job. But the next time something else breaks on this Miele, I will order this part too and replace both at the same time.
Follow the instructions in reverse to put your vacuum cleaner back together.I hope you found my little tutorial useful.188 views
Usually answered in minutes!


×