
They just snap on. Easy fix would be take car to auto zone they put those on for free.


 Mark the existing wiper position on the windshield using a crayon. This
will help you align the wiper arm correctly when you install a new one.
Alternatively you can use the Trucks
own markings. At the bottom center of the windshield you will see
writing and three small dots. The wiper should rest on top of these
dots.
Step2
Mark the existing wiper position on the windshield using a crayon. This
will help you align the wiper arm correctly when you install a new one.
Alternatively you can use the Trucks
own markings. At the bottom center of the windshield you will see
writing and three small dots. The wiper should rest on top of these
dots.
Step2
 Follow the wiper arm down to where it connects with the Truck. You should find a hinged cap at the end.
Step3
Follow the wiper arm down to where it connects with the Truck. You should find a hinged cap at the end.
Step3
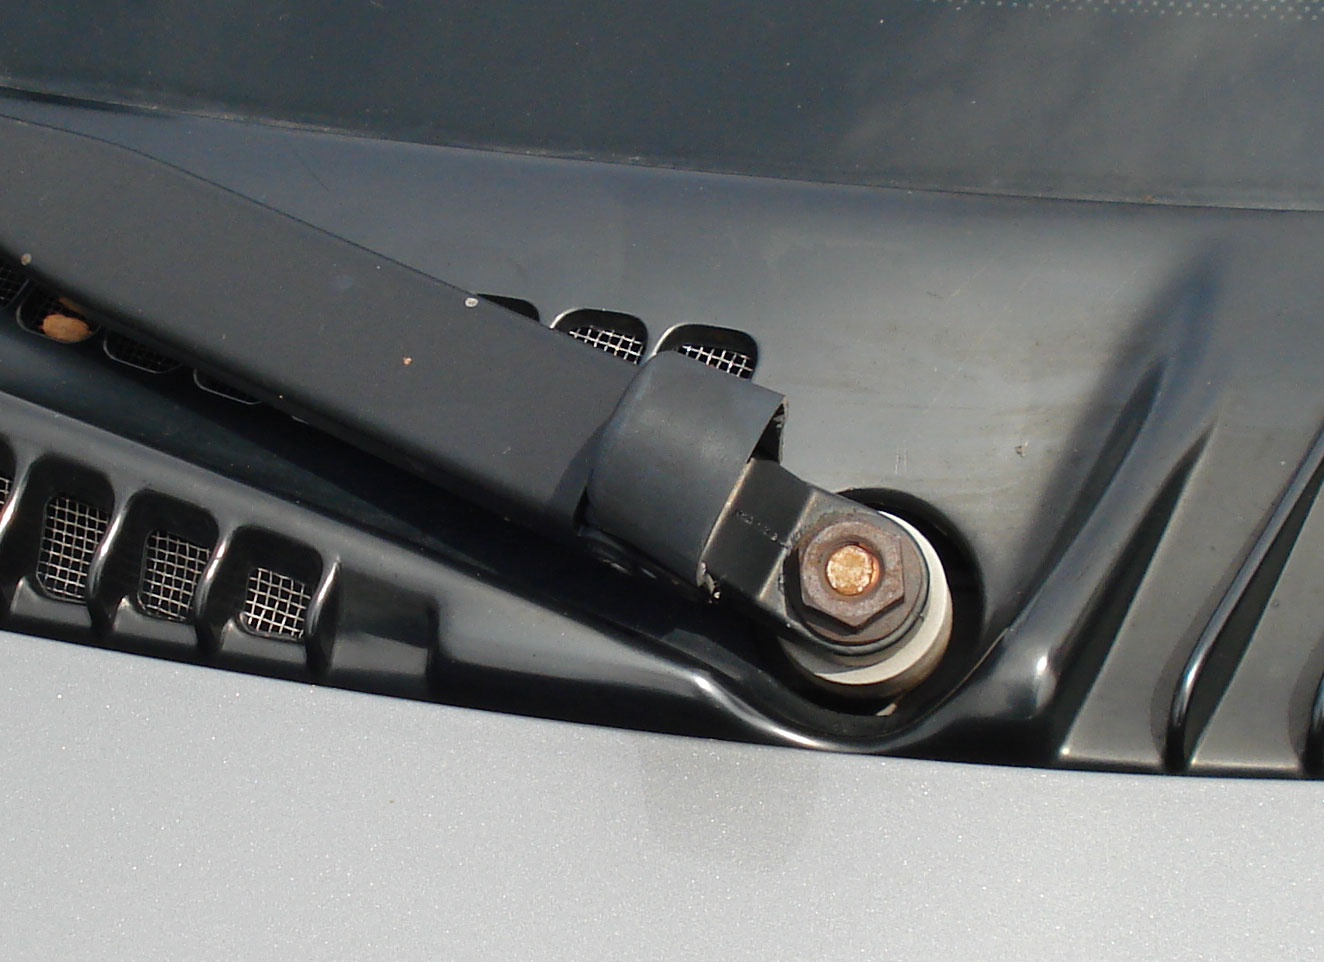 Lift this cap to reveal the nut and screw underneath.
Step4
Lift this cap to reveal the nut and screw underneath.
Step4
 Use a wrench (or socket and ratchet) to loosen the nut.
Step5
Use a wrench (or socket and ratchet) to loosen the nut.
Step5
 Remove the nut completely, leaving the screw stud exposed and the wiper arm free to be removed.
Step6
Remove the nut completely, leaving the screw stud exposed and the wiper arm free to be removed.
Step6
 Lift the arm straight up. Wiggle the arm and pull upwards at the same
time until the arm slides free of the screw. If it seems stuck, push
the arm back down and proceed to Step 7.
Step7
Lift the arm straight up. Wiggle the arm and pull upwards at the same
time until the arm slides free of the screw. If it seems stuck, push
the arm back down and proceed to Step 7.
Step7
 Use a battery cable puller to pry the arm loose. Arrange so the large
puller screw cap sits on top of the wiper arm screw. The outside arms have flat fingers that should be fitted underneath the
wiper arm.
Step8
Use a battery cable puller to pry the arm loose. Arrange so the large
puller screw cap sits on top of the wiper arm screw. The outside arms have flat fingers that should be fitted underneath the
wiper arm.
Step8
 Grasp the handle at the top of the puller and turn clockwise. The
puller screw will push down on the wiper arm screw and simultaneously
pull up on the wiper arm. A few slow turns should pop the wiper arm
free.
Grasp the handle at the top of the puller and turn clockwise. The
puller screw will push down on the wiper arm screw and simultaneously
pull up on the wiper arm. A few slow turns should pop the wiper arm
free.
87 views
Usually answered in minutes!


×