The driver side head lights of my BMW x3 2004 is aiming too high. Please advice me how can I fix it, thank you so much.
Hi
you normally have dimmer roller (setting 0,1,2,3,4) next to head light on/off switch.
or on top off the headlight unit there are two allen key bolts to adjust the kick and up/down movement.
thanks
SOURCE: headlight aiming too high
Make sure the bulb was put in correctly and sitting flat as bulb replacement does not require head light adjustment.Check head light bulb before attempting to adjust
SOURCE: headlight aiming too high - how to adjust?
pop your hood open and on flat surface check too see where the beads are in the bubble levels,if they are off then there are 2 adjustments on each headlight,some require special tool they look like little gears on the adjusters. make sure car is on good flat surface
SOURCE: 2002 nissan xterra headlight is aiming up too high
on each headlamp assembly, there will be either one or two plastic nuts that you can turn.
If you only have one nut on each, that will adjust the vertical aim of the headlights.
If you have two nuts on each, one will adjust the vertical and the other will adjust the horizontal.
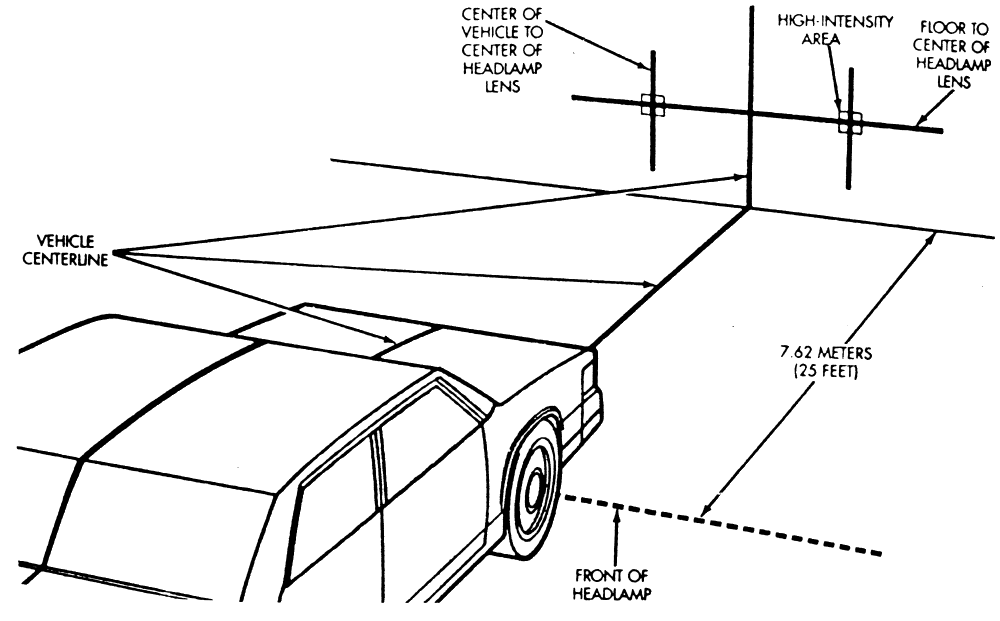
Park
your car on a level ground 30 feet from a wall and measure the height
from the ground to the bulb and mark on a wall (do this for highs beams
and low beams if the bulbs are separate, if highs and lows are the same
bulb, only do it for the lows)
If the headlights read VOR, then
aim the brightest part or cutoff part just below the mark on the wall.
If it says VOL or nothing, aim them 2 inches below the mark on the wall.
SOURCE: head / fog light adjustment
on each headlamp assembly, there will be either one or two plastic nuts that you can turn.
If you only have one nut on each, that will adjust the vertical aim of the headlights.
If you have two nuts on each, one will adjust the vertical and the other will adjust the horizontal.
Park
your car on a level ground 30 feet from a wall and measure the height
from the ground to the bulb and mark on a wall (do this for highs beams
and low beams if the bulbs are separate, if highs and lows are the same
bulb, only do it for the lows)
If the headlights read VOR, then
aim the brightest part or cutoff part just below the mark on the wall.
If it says VOL or nothing, aim them 2 inches below the mark on the wall.
SOURCE: The nearside headlight on my BMW Mini appears to be set too high
if you open the bonet and look at the light their is adjustment on it


3,752 views
Usually answered in minutes!


×